Why Route Choice Decides Your Banana Count
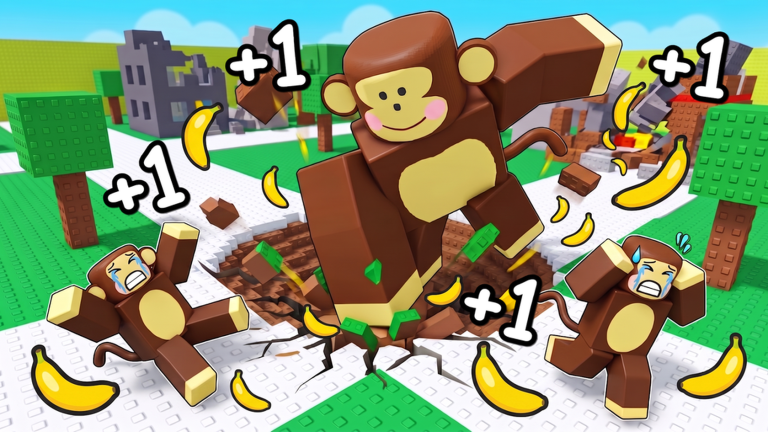
1 Banana Monkey Destruction, built by Kaboom Creations, runs on one verified loop: punch, destroy, collect bananas, upgrade, then repeat. The official Roblox page tells you plainly to punch and destroy what comes your way, collect bananas to get bigger and stronger, upgrade your stats, and return for the daily free trainer. With a server cap of 8 players, roughly 29.8 million visits logged, and about 194 players active, the difference between a slow session and a fast one almost always comes down to which route you commit to and which build you shape around it. This guide breaks down the strongest route options, shows when each one works, and gives you game-specific examples you can run today.
Comparing the Strong Route Options
Every route in 1 Banana Monkey Destruction feeds the same four confirmed actions, but they distribute your time differently. Here are the two strongest approaches and how they stack up:
- The Trainer-First Solo Route. You log in, claim the free daily trainer described on the official page, then farm one starter zone in a tight loop of punch, destroy, collect. Because you never share targets, every drop you create is yours. This is the cleanest route for players who want predictable upgrade timing.
- The Sector-Split Team Route. With 8 player servers, you divide the map into assigned sectors so no two players are punching the same object. Destruction speed rises sharply, and the team converts a shared banana pool into upgrades faster than any solo run can manage.
The solo route wins when you are still learning how much punch damage you need to clear a starter zone outright. The team route wins once your upgrades already one-shot early targets, because extra damage on a target you already clear is wasted, while added destruction coverage across sectors is not.
The Trainer-First Solo Build: When and How It Works
This build is for the player who wants a measured path from their first session toward stronger worlds. The sequence matters:
- Claim the daily free trainer before your first punch. The official description says to return for the daily free trainer, so treat it as your session opener rather than an afterthought. Skipping it leaves your stats lower for the entire farming run.
- Farm one zone until it stops challenging you. Pick the starter zone and loop its targets until every object breaks on the same punch rhythm. The site guide calls this step testing your strength against repeatable targets, and it is the honest way to see your real damage.
- Spend bananas only when the live screen shows the payoff. Upgrade costs and damage numbers are not published anywhere confirmed, so watch the change in destruction speed after each purchase. If a zone still breaks at the same pace, hold your bananas.
- Set a world-destruction goal. Measure progress by zones cleared rather than by banana totals. The path described by the official site moves you toward stronger worlds, so treat each cleared zone as a gate you have passed.
The Sector-Split Build: When and How It Works
This build only pays off with a coordinated group, and it is where the 8 player cap becomes an advantage instead of a crowd. Structure it like this:
- Assign sectors, not players, to targets. Give each member a section of the map so two punches never land on the same object. Overlapping hits are the single biggest waste in group farming.
- Run a dedicated collector. Once targets break, bananas drop on the ground. One player who only moves between drop points captures what a destruction-focused player would otherwise run past.
- Split the punch and finish roles. Weaker targets go to a player softening them, while a higher-damage player finishes the tougher objects that return the bigger banana rewards. This mirrors the verified punch and destroy step without guessing at any hidden numbers.
- Sync the trainer check. Group members should all claim the daily free trainer before the sector run begins, so nobody is farming with lower stats than the rest of the squad.
A practical example: two players take the outer sector, one takes the center cluster, and one cycles drops. That single collector converts scattered ground bananas into upgrade funds that the rest of the team would have missed while still punching.
Game-Specific Examples From Recent Play
Creator gameplay uploaded in late July 2026 shows the giant monkey payoff that strong upgrades unlock, with the loop clearly visible as destruction feeding size and power. Use that as your visual benchmark: if your current route never gets you past early targets, your route is the problem, not your punch timing. On the wiki side, a September 2026 check confirms that no redeem system is currently listed for this experience, which means your entire progression economy runs through bananas, upgrades, and the daily trainer. There is no shortcut menu waiting for you, so the route you pick really is the whole game.
Quick FAQ
Q: Does 1 Banana Monkey Destruction have a codes menu or redeem button right now?
No. A September 27, 2026 recheck reported no codes menu and zero code strings for this experience, and the official Roblox description does not mention a code system. Treat any shared string as unconfirmed and rely on bananas, upgrades, and the daily trainer instead.
Q: Should I play solo or fill an 8 player server to farm faster?
Solo is better while you are still learning how many punches it takes to clear a starter zone, since every drop stays yours. Move to a full server once your upgrades already clear early targets quickly, then split sectors so no player wastes damage on shared objects.
Q: What exactly does the daily free trainer do for my stats?
The official Roblox description lists the daily free trainer as a reason to return, but no confirmed numbers or multipliers are published for it. Claim it at session start and compare your destruction speed before and after to judge its real effect.
Conclusion: Pick the Route That Matches Your Server
If you are grinding alone, build your session around the daily free trainer, one dedicated zone, and upgrades you can actually see paying off. If you can assemble a squad inside the 8 player cap, split the map into sectors, run a collector, and keep every member on the same trainer timing. Both routes follow the same verified loop of punch, destroy, collect, upgrade, repeat, but only one of them fits the way your server is actually populated. Choose deliberately, measure your zone clears, and your banana count will reflect it.
Active 1 Banana Monkey Destruction Codes (November 2026)
No verified active codes are available right now for 1 Banana Monkey Destruction.