Intro to Endgame in Auto Wallhop Tower But Hard!
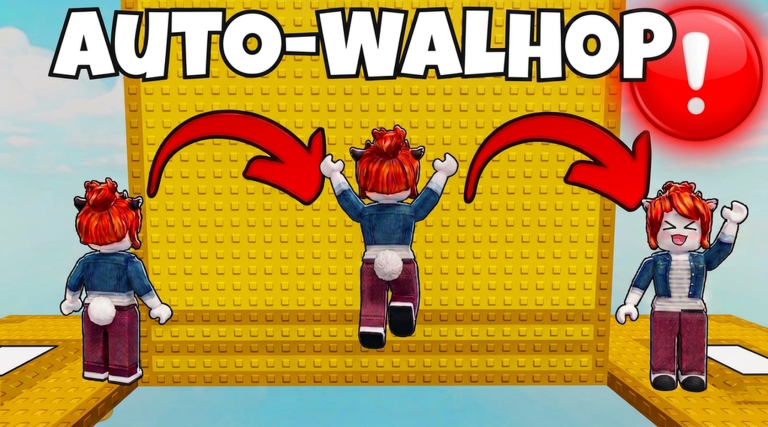
Auto Wallhop Tower But Hard! pushes Roblox players beyond simple tower climbs with its unique auto wallhop mechanic, where your avatar jumps automatically on surface contact. As you progress, the game shifts from introductory challenges to demanding endgame content that tests mastery of timing and positioning. This guide focuses on what awaits after the initial climb, including post-progression goals, competitive ladders, and community-driven events. While codes are occasionally released by the developer, there are currently none to redeem, but this page is monitored and updates the moment codes drop. When new codes are released, they will appear in the live list below.
What Counts as Endgame in Auto Wallhop Tower But Hard!
Endgame in Auto Wallhop Tower But Hard! is defined by climbing to high floors where the auto wallhop mechanics become extremely nuanced. Unlike early floors with straightforward walls, later stages introduce rotating platforms, moving barriers, and narrow timing windows that require precise horizontal control. The game does not have traditional prestige or rebirth systems; instead, progression is skill-based, with the leaderboard tracking how far you climb. Reaching floor 50 or higher is often considered a milestone, as it unlocks cosmetic changes like a different color for your wallhop trail. Endgame also involves optimizing your route for speed, using practice mode to drill difficult sections, and competing against ghost replays from top players.
Progression Systems Explained: Checkpoints and Unlocks
Auto Wallhop Tower But Hard! features a checkpoint system that serves as its primary progression aid. Every ten floors you clear, you unlock a new starting point, so you never have to replay the entire tower from floor 1. This is crucial for endgame play, as it reduces repetition and allows you to focus on mastering specific high-floor patterns. Another unlock is the leaderboard filter for friends, which appears after you add at least one friend who has also played the game. This helps in tracking group progress and comparing floor counts. There are no stat boosts or gear upgrades; all progression comes from improving your skill with the auto wallhop, making each successful climb a personal achievement.
Rare Collectibles and Completionist Goals
For completionists, Auto Wallhop Tower But Hard! offers cosmetic rewards tied to high-floor achievements. Reaching floor 50 reportedly changes the color of your wallhop trail, though this is purely cosmetic and rare. Additionally, the leaderboard provides goals such as ranking among the top climbers or clearing specific floors without using practice mode. Some players aim to complete the entire tower, but with ongoing updates, new floors may be added, extending the completionist journey. Ghost replays serve as a form of collectible, where you can study the movement paths of top players for each floor, adding a layer of learning and inspiration to your progression.
Competitive Ladders and Leaderboard Strategies
The leaderboard in Auto Wallhop Tower But Hard! is a core competitive element, ranking players based on how high they climb. To excel in the endgame, focus on consistency rather than speed. Use practice mode to drill floor patterns until you can execute them without thinking, then attempt the real run. The game difficulty spikes every five floors, so be prepared to stall around transitions like floor 8 or 9. Watching ghost replays immediately after a failed run helps identify mistakes. On floors with moving platforms, wait for the platform to start moving before triggering the hop, as pressing direction too early can cause your character to hover and drop. Patience and precise timing are key to climbing the competitive ladder.
Community Challenges and Events
The community in Auto Wallhop Tower But Hard! is active and supportive, often sharing tips in public servers for tricky walls. Endgame challenges may involve group attempts to clear high floors together or comparing leaderboard positions. The developer occasionally releases codes through the official Roblox group and Discord server during events, milestones, or holidays, though no rewards can be claimed yet. These events add a social dimension to the endgame, encouraging players to engage with the community for strategies and updates. Participating in such events can provide motivation and new goals beyond solo climbing.
Frequently Asked Questions
Q: How do I prepare for endgame floors in Auto Wallhop Tower But Hard!?
Focus on mastering the auto wallhop mechanics by using practice mode for difficult floors. Set goals to clear one floor per session and watch ghost replays to study movement paths. Building consistency with timing and positioning is essential for high-floor success.
Q: What unlocks are available for long-term progression?
The main unlocks include checkpoint starters every ten floors and the leaderboard filter for friends. At floor 50, you may see a cosmetic change to your wallhop trail color. These rewards are skill-based, encouraging continuous improvement rather than stat boosts.
Q: How can I stay updated on new codes or events for Auto Wallhop Tower But Hard!?
Check the official Roblox group and Discord server for announcements, as the developer releases codes during events. This page is monitored and updates when new codes appear, so the live list below will reflect any changes.
Conclusion: Push Your Limits in the Endgame
Auto Wallhop Tower But Hard! offers a rewarding endgame where skill mastery leads to leaderboard glory and cosmetic unlocks. By leveraging checkpoints, practice mode, and community tips, you can tackle post-progression goals effectively. Remember that codes are not currently active, but staying engaged with the game and community will prepare you for future updates. Keep climbing, refine your auto wallhop technique, and aim for the high floors to experience the full depth of this challenging tower climber.
Active Auto Wallhop Tower But Hard! Codes (October 2026)
No verified active codes are available right now for Auto Wallhop Tower But Hard!.