Which Setup Actually Wins in Ragdoll Physics 2
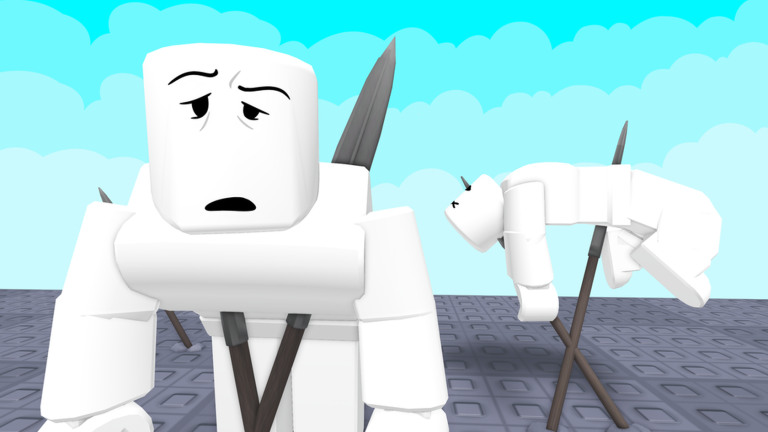
Ragdoll Physics 2 is a simulation sandbox built around testing how the Roblox ragdoll solver treats your avatar. The interesting part is that your results depend far more on camera and timing setup than on how hard you throw yourself around. Three setups dominate right now, and each one wins in a different place on the map. Pick the wrong one and a two second fall turns into an unreadable blur. Pick the right one and you can watch every bone give way in order.
Option one: slow motion as your default
Slow motion is the game's secret star. It takes a messy two second fall and turns it into a readable sequence where you can see which joint failed first. This is the strongest option for anyone trying to understand why a ragdoll behaves the way it does, because the solver runs the same physics, just stretched across more frames for you to read. Use it whenever a collapse happens faster than you can follow it.
Option two: first person for precision work
First person is the precision tool. Aiming at a specific ankle or wrist is far easier in first person than in the default third person camera, because the third person view puts the camera behind your torso and the target limb drifts off center. If your plan depends on hitting one exact joint, switch to first person before you start, not after you have already missed.
Option three: default third person for big picture runs
Third person is still the right call for route style runs where you need to see where you are heading. When you are chaining movement across the Map Center toward the Escalator, you need the wider field of view more than you need joint level accuracy. This is the one case where staying in the default camera is a deliberate choice rather than a lazy one.
When Each Setup Works Best
The practical rule is simple. Slow motion first, then camera choice. Turn slow motion on before you trigger a fall, because enabling it mid collapse means you already lost the first frames. Then match the camera to the job:
- Hazard experiments: slow motion plus third person, so you can watch the dummy travel into the honey pit or quicksand and see how long it struggles.
- Joint targeting: first person, so an ankle or wrist stays centered while you aim.
- Cross map movement: third person, so the Building, Map Center, Gravity Chamber, Escalator, Pool and Spiral Stairs all stay readable as you move between them.
Cripple Then Hazard: The Route That Looks Best
One setup consistently produces the most convincing results: shoot a leg before pushing a dummy toward the honey pit or quicksand. An injured dummy struggles longer, and the longer struggle means more frames of contact with the hazard. This is the closest thing the game has to a build route, and it works because the two systems compound rather than compete. Cripple first, hazard second, slow motion running the whole time.
Run the same idea inside the Gravity Chamber, where the special gravity effect already changes how limbs swing. A crippled limb under altered gravity stays in motion longer than a healthy one under normal gravity, so the chamber becomes the best place to study joint failure without touching a hazard at all.
Reading the Physics Underneath Your Runs
Some of the odd behavior you see in Ragdoll Physics 2 comes from how the engine treats connected limbs. Adjacent limbs that keep colliding with each other produce visible jitter and wasted solver work, which is why a freshly ragdolled avatar can shake before it settles. Expect most ragdolled bodies to be fully dynamic for only one to two seconds, then settle. Once motion drops off, the body stops costing much, so the readable window for a clean experiment is right at the start of the fall, inside that one to two second stretch.
Also remember the basic controls while you are testing: W, S, A and D move, Spacebar jumps, and F toggles ragdoll on and off. Clicking on another player performing an emote syncs you into it, which is a quick way to line up two avatars for a side by side comparison of the same fall.
Game Specific Examples Worth Repeating
- Pool drop: slow motion, third person, crippled leg, then push toward the Pool edge and watch the splash sequence frame by frame.
- Spiral Stairs tumble: first person so you keep the rail and steps centered while the solver works through repeated contacts.
- Gravity Chamber study: no hazard needed, just crippled limbs and slow motion to isolate joint failure from environmental interference.
FAQ
Q: Should I turn on slow motion before or after I start a fall in Ragdoll Physics 2?
Before. Slow motion only helps if it is running from the first frame, because the most informative part of a collapse happens in the first one to two seconds while the body is still fully dynamic.
Q: Which camera is better for hitting a specific ankle or wrist?
First person. The default third person camera sits behind your torso, so a targeted limb drifts off center. First person keeps the ankle or wrist centered while you aim.
Q: Why does my ragdoll shake right after it collapses?
Connected limbs register contacts against each other every physics step until the body settles, which shows up as jitter. It usually disappears once the body comes to rest.
Conclusion
Efficient runs in Ragdoll Physics 2 come from setup, not from spamming falls. Enable slow motion first, choose first person for joint work and third person for route movement, and use the cripple then hazard order through the honey pit, quicksand, Pool and Gravity Chamber. Do that and every experiment gives you a sequence you can actually read instead of a blur you have to guess at.
Active Ragdoll Physics 2 Codes (November 2026)
No verified active codes yet for Ragdoll Physics 2; 29 unverified codes are being tracked.