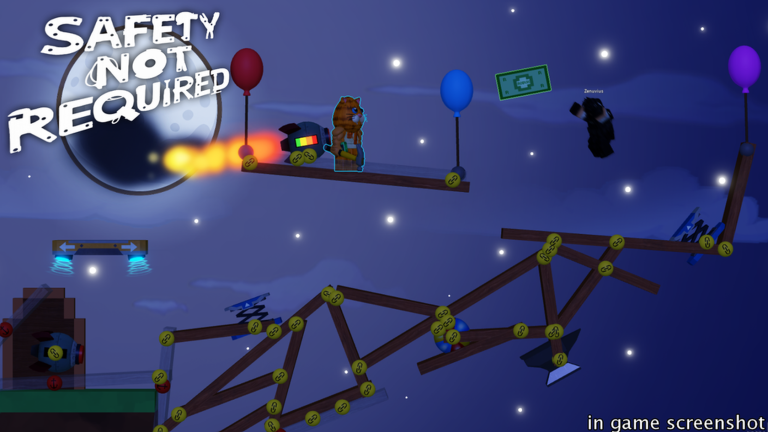
Safety NOT Required! is a chaotic Roblox team game inspired by Transformice. One player becomes the builder, while everyone else plays as runners, all working together to reach the money before the timer runs out. If you have played any similar physics-based team games, you know the drill. But what separates a winning round from a fall into the void? It comes down to choosing the right builds and routes, and understanding how the in-game badge system rewards clever strategies. This guide breaks down the best builder loadouts, runner paths, and hidden techniques, all based on what the game actually teaches through its achievements.
The Builder's Loadout: Anchored Stability vs Free Build Chaos
The builder is the heart of every successful run. You can create structures with a single click, but the challenge is making them usable. The simple guide for the game famously asks, "who knows how to build a stable bridge??" That question highlights the biggest failure point: stability. The badge Unanchored & Free Build hints at one of the core mechanics. You have the option to anchor objects to the world or leave them unanchored. For a stable bridge, you should always anchor at least one piece of a multi-part structure to a solid base. Without that anchor, your carefully placed objects will slip, tilt, or tumble into the abyss.
When you are in a hurry, free building (leaving everything unanchored) can work for a quick one-person shortcut, but it is not reliable for the whole team. Compare that to the Evil Building badge, which suggests that builders can also use structures to block, trap, or even harm other players. That is a valid strategy in certain rounds, especially if you need to stall an opposing team, but if you are on the same team as whoever is running, evil building usually costs you the win. The best loadout is a mix: a solid, anchored main path for everyone, plus a few unanchored pieces that you can adjust if something goes wrong.
Choosing Your Route: Direct Bridge vs Elevated Ramp
Runners have just as much responsibility as the builder. You need to pick a route. Two strong options are the direct bridge and the elevated ramp.
- Direct bridge: The builder lays a horizontal path across the gap. This is fast to build and easy for every runner to cross. It works best on short gaps or when the team needs to move all at once. The downside is that everyone is in a straight line, making you an easy target for any evil builders on the map.
- Elevated ramp: The builder creates a tall, sloped structure that launches runners into the air, landing them far across the gap. This is more complex, but the Fly Away badge shows that being launched is a legitimate, fast way to travel. Elevated ramps are great for skipping dangerous ground sections, but they require precise placement and a stable anchor to avoid sending runners on a one-way trip into the void.
When should you use each? If you are the builder, look at the map. On flat sections with no threats, a direct bridge is best. On wide chasms or when you see traps below, an elevated ramp gives the team an edge. Runners, communicate which type of build you prefer before the round starts.
Badge-Backed Strategies for Smarter Team Play
The achievement list in Safety NOT Required! is actually a hidden tutorial. Badges like Left Behind and Impatient teach you what not to do. Run too far ahead of the builder, and you get left without a path. Rush the money too quickly, and you may fall into a gap that the builder is still working on. The smartest route is to stay two or three blocks behind the builder, ready to step on each new structure the moment it appears.
If you ever lose sight of the builder, the Where Builder badge is a reminder to check where their structures are coming from. Follow the trail of anchored objects. Also consider the Worthy Sacrifice badge. Sometimes a runner can intentionally take a hit or fall to buy the builder enough time to finish a crucial piece of the route. That might sound weird, but in a chaotic round, one small sacrifice can turn a losing round into a Built to Win moment.
Fastest Routes for the Money
The goal is always the same: get the money. To do that as fast as possible, you need a route that is both quick and safe. A Superior Building badge strategy is to combine a direct bridge with a short elevated ramp near the end. That way, the team crosses the main gap safely, then launches directly onto the money platform. This route follows the philosophy of "work smarter, not harder." It uses anchored pieces for 90% of the path and one unanchored, flexible launch piece for the final stretch.
Keep an eye on the Winstreak badge, too. It rewards consistent wins. Consistency comes from repeating the same reliable build order and route pattern. Find one bridge style that works, practice it until you can place it without hesitation, and your win streak will climb.
FAQ
Q: What is the best way to build a stable bridge in Safety NOT Required!?
A: The Unanchored & Free Build badge hints that anchoring is optional, but for a stable bridge, anchor at least one piece to a solid base. The simple guide even asks "who knows how to build a stable bridge??" because so many players try to build without anchoring. Start with a sturdy, grounded object, then attach everything else to it.
Q: How can I earn the "Superior Building" badge?
A: Focus on creating elevated structures that give your team a height advantage. The badge name suggests making a build that stands above the ordinary. Try building a ramp that launches runners across a gap, similar to the Fly Away technique. Place it carefully and anchor the base so the ramp does not collapse.
Q: Should I stay with the builder or rush to the money?
A: The Left Behind and Impatient badges show the consequences of both extremes. If you rush ahead, you get left behind when the builder fails to reach you. If you wait too long, you might not reach the money in time. The best route is to stay just behind the builder, ready to move the moment a stable path appears.
Conclusion
Safety NOT Required! is a game that rewards builders who think about stability and runners who think about timing. By using anchored structures, choosing between direct bridges and elevated ramps, and paying attention to the lessons hidden in the badge list, you can turn chaotic rounds into smooth, efficient runs for the money. Whether you are building for the first time or trying to beat your best win streak, start with a solid foundation and let the team follow your lead.
Active Safety NOT Required! Codes (September 2026)
No verified active codes are available right now for Safety NOT Required!.