Introduction
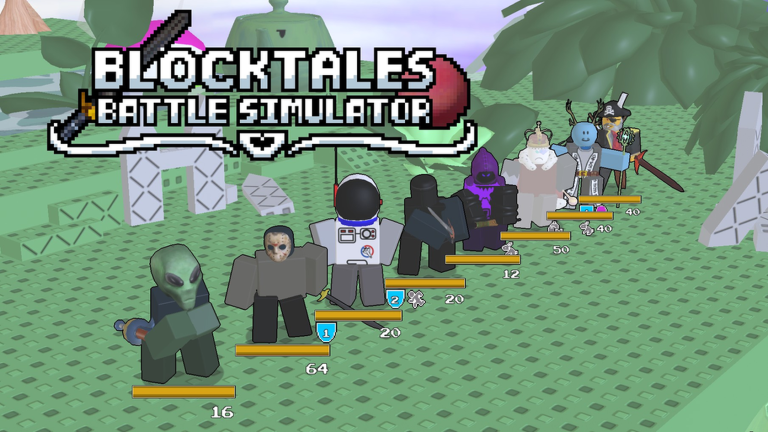
In Block Tales Battle Simulator, your success hinges on adapting skill rotations to whether you are playing alone or with a squad. The game's core mechanics, like aggro targeting and BUX distribution, change dramatically based on group size. As of August 2026, the Baller and Aggressor builds dominate the meta, and knowing how to sequence their abilities for solo or group scenarios can maximize your efficiency. This guide breaks down the hidden mechanics of skill rotations for different play styles, focusing on specific builds, maps, and roles to give you an edge.
Differences Between Solo and Group Skill Rotations
The key difference lies in enemy focus and reward sharing. When playing solo, all enemies target you, so your rotation must balance damage with survival. For example, in the Baller build, you might start with Line Bounce to chain hits across multiple enemies, then follow with Cannonball to reflect projectiles and maintain crowd control. This keeps you alive while clearing waves. In a group, aggro splits across players, allowing pure damage rotations. Here, an Aggressor build can prioritize Blade Storm for area damage and Power Surge for burst, without needing defensive skills. The Pit map illustrates this: solo, a Baller rotation clears the entire area in under 90 seconds and retains all 5000 BUX, while in a squad, rotations can focus on speed, cutting the time to 60 seconds but splitting the BUX payout. Understanding this dynamic lets you choose the right rotation for your goal, whether BUX farming or legendary card drops.
Best Solo Skill Rotations for Maximum Efficiency
For solo play, the Baller build's rotation is optimized for sustain and wave clearing. Equip Line Bounce and Cannonball. Begin encounters by using Line Bounce to hit multiple enemies, building up combo potential. Then, activate Cannonball to reflect incoming attacks, which disrupts enemy patterns and reduces damage taken. In the Pit, repeat this rotation across three full clears to farm roughly 5000 BUX each time, leveraging the double BUX multiplier from the July event. After that, move to Sword Fight on the Heights for consistent Bucks to unlock premium card slots.
When soloing bosses like Frostmaw in the Frozen Cavern, switch to an Aggressor build with Blade Storm and Power Surge. Start with Blade Storm to clear ice minions quickly, then time Power Surge for burst damage during Frostmaw's vulnerable window. This rotation can finish the boss in four rounds. For Hatred, a hybrid rotation is necessary: use Shield Wall to survive its AoE attack, then chain Power Surge into Blade Storm for maximum burst during the brief vulnerable phase. These rotations are tailored to each boss's mechanics, ensuring you can handle them alone.
How to Adapt Your Rotations in a Group Setting
Group play allows you to specialize your rotations. If you are running the Baller build, you can drop Shield Wall for Heavy Strike when a teammate draws aggro. In the Pit, coordinate rotations so one player leads with Line Bounce to herd enemies into tight packs, while others use Blade Storm to clear corners efficiently. The double BUX multiplier still applies, but since rewards are split, communicate beforehand whether you are focusing on BUX or kill counts.
For boss fights, optimal group rotations involve role synergy. A tank with Shield Wall and high HP should use rotations that maintain aggro, like alternating basic attacks with defensive skills. A damage dealer with an Aggressor build can focus on pure damage rotations, chaining Blade Storm, Heavy Strike, and Power Surge when the tank has enemy focus. A support using Comosse should time rotations to boost BP generation, allowing the damage dealer to chain abilities faster. This setup shortens boss fights significantly. Avoid running three Aggressors, as Hatred's multi-phase AoE will overwhelm you without proper aggro management.
Team Roles and Their Specific Rotations
Assign clear roles to streamline rotations in a squad. The tank's rotation should prioritize Shield Wall to absorb damage, combined with Comosse to support team energy generation. They keep bosses like Hatred or Frostmaw focused in melee range. The damage dealer runs a pure Aggressor rotation, starting with Blade Storm for area damage, then using Power Surge for burst during openings. Only attack when the tank has aggro to avoid drawing fire. The support uses Line Bounce and Cannonball rotations to reflect attacks from adds and buff the team with Comosse, enhancing BP flow. This trio can clear the Frozen Cavern in under three minutes repeatedly.
In the Pit, the support adapts by using Cannonball to bounce attacks into tight enemy packs, aiding wave clearance. The tank's rotation should include collecting all BUX orbs while the damage dealer clears, minimizing time spent backtracking. If you have a fourth player, make them a second damage dealer with a rotation focused on mini-bosses, like targeting elite enemies with focused Blade Storm strikes. Always discuss rotations before each run to ensure everyone knows their part.
When to Switch Between Solo and Squad Rotations
Adapt your approach based on your current goals. If you are grinding BUX quickly, stick to solo Baller rotations in the Pit, running three clears before stopping to respect the daily event token cap of 20. BUX itself has no cap, so this is ideal for efficient farming. For legendary card drops, switch to squad play for boss farming, as the weekly cap of three legendary card drops is shared across the server, but coordinated group rotations increase your chances of claiming them before others. If time is short, solo Pit runs are most efficient. When playing with friends, transition to group rotations for boss clears and shared farming to enjoy the social aspect while still making progress.
Frequently Asked Questions
Q: What is the best solo skill rotation for BUX farming in the Pit?
A: Use the Baller build with Line Bounce followed by Cannonball. Start each engagement with Line Bounce to chain hits across enemies, then activate Cannonball to reflect projectiles and maintain crowd control. Repeat this rotation for three full clears to maximize BUX intake under the double multiplier.
Q: How should I adjust my Aggressor rotation for boss fights in a group?
A: In a group, focus on damage rotations: use Blade Storm for area damage, then time Power Surge for burst during the boss's vulnerable window, like after Hatred's AoE attack. Coordinate with your tank so you only attack when they have aggro, minimizing risk.
Q: What role rotations are most effective for clearing the Frozen Cavern quickly?
A: The optimal trio involves a tank with Shield Wall and Comosse rotations to maintain aggro and boost BP, a damage dealer with Aggressor rotations using Blade Storm and Power Surge for burst, and a support with Line Bounce and Cannonball rotations to reflect adds and enhance team energy. This setup can clear the cavern in under three minutes.
Conclusion
Mastering skill rotations in Block Tales Battle Simulator requires understanding the nuances between solo and group play. By tailoring your builds and ability sequences to the situation, such as using Baller rotations for solo BUX farming or Aggressor rotations for group boss clears, you can optimize your efficiency and enjoyment. Remember to adapt your role and rotation based on your team's needs, and switch approaches when your goals change. With these strategies, you are well-equipped to tackle any challenge in the game as of August 2026.
Active Block Tales Battle Simulator Codes (September 2026)
No verified active codes are available right now for Block Tales Battle Simulator.