Introduction to Build a base RNG Economy Optimization
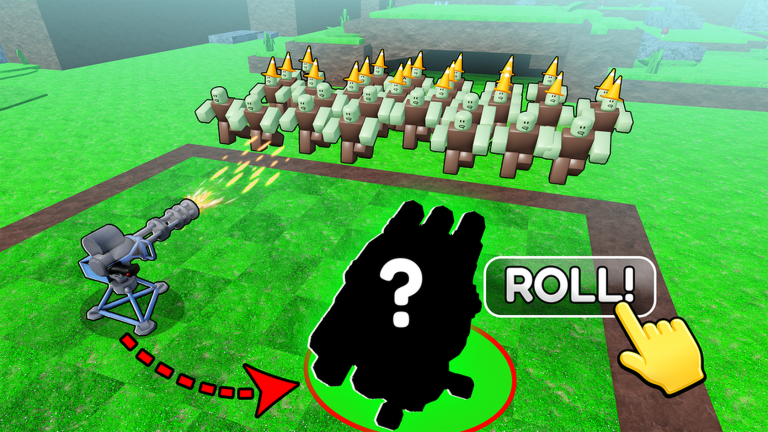
Build a base RNG by Slungpy Games revolves around a core loop: roll for random objects, place them strategically in your base, and defend against waves of enemies. As of September 2026, the game has no verified codes or redemption menu, so your progress depends entirely on smart economy management and tactical play. This guide focuses on optimizing your approach based on whether you play alone or with friends. The economy, driven by income-producing objects and upgrade paths, is critical for surviving later waves. We will break down the differences between solo and group play, offer specific strategies for each, and suggest roles to streamline teamwork. Remember, the key to success lies in efficient rolling, thoughtful placement, and adapting your strategy to your play style.
Key Differences Between Solo and Group Play
When playing solo, you have complete control over every decision. This means you can tailor your economy to a cohesive plan without relying on others. You roll for objects, choose which to keep, and place them based solely on your judgment. In group play, control is shared, which brings speed but also potential chaos. Multiple players can roll simultaneously, gathering more objects and upgrading faster, but without coordination, resources can be wasted on overlapping placements or duplicate items. The economy in solo play is about self-sufficiency, while group play requires shared investment in income objects to benefit the entire team. Both modes demand a clear understanding of the Roll, Build, Defend cycle to maximize your output.
Best Economy Strategies for Solo Players
As a solo player, every roll and placement must count towards your economic growth. Start by prioritizing income-producing objects like generators or resource collectors, as these form the backbone of your progression. For example, aim for early rolls that yield items like the basic Income Crate or Energy Node, which provide steady currency or resource streams. Avoid over-investing in defensive objects early on; a common mistake is building too many walls at the start, which leaves you cash-strapped for upgrades later. Instead, place durable objects like Reinforced Barriers at the front to absorb damage, with damage dealers like Cannon Turrets directly behind them to handle enemy waves efficiently. Keep your income objects in the safest spot, such as the center or rear of your base, to protect them from breaches. Save a few rolls before anticipated big waves, so if you randomly roll a high-value object like a Mega Blaster, you can place it near the main enemy path. This approach ensures your economy grows steadily without compromising defense.
Adapting Economy Tactics for Group Play
In group play, division of labor is essential for economic efficiency. Assign roles to prevent wasted rolls and streamline building. For instance, have one player dedicated to rolling, focusing on requests from the builder rather than chasing rare drops. The builder should prioritize placing income objects first, such as upgrading shared Income Crates to Level 2 or 3, which benefits all players. Communication is critical; use in-game chat to call out rare rolls like the Legendary Resource Hub and coordinate upgrade timing. If your group has more than two players, consider splitting the base into zones, but ensure shared defense at entry points with objects like Spike Traps or Auto-Turrets. Upgrade income objects collectively, as one player's investment boosts the whole team's economy. This cooperative approach can accelerate progression, allowing you to access better defenses like Shield Generators faster than in solo play.
Role Suggestions for Streamlined Team Economy
To optimize group economy, define clear roles before the first wave. This prevents confusion and ensures resources are allocated efficiently.
- Roller: Spends the group's rolls, prioritizing income and defense requests. For example, focus on rolling for Income Boosters or defensive items like Fortification Blocks as needed.
- Builder: Places and upgrades all objects, starting with income-producing items like Resource Silos, then moving to defenses such as Laser Towers. Avoid overlapping placements to maximize space efficiency.
- Defender: Monitors enemy paths, repairs damaged objects like barriers, and calls out weak spots. This role supports the economy by minimizing losses from breaches.
- Manager: Tracks income flow, decides when to roll versus upgrade, and plans for boss waves. For instance, hold off on expensive rolls if a big upgrade is imminent.
Rotate roles if someone gets lucky with rolls, so the group adapts flexibly. For two-player teams, keeping it simple with one roller and one builder often works best.
When to Switch Between Solo and Group Play
If you are struggling solo to survive later waves, joining a group can speed up your economy through shared rolls and builds. The extra resources from multiple players allow for faster upgrades to items like Advanced Turrets or Power Cells. Conversely, if group communication feels chaotic, try a solo run to develop a self-sufficient base. Solo play forces you to master precise placement and roll management, which can be more efficient if you build correctly. For example, a solo player focusing on income objects like Yield Amplifiers can sustain upgrades without relying on others. There is no single best approach; choose based on your ability to coordinate and your preference for control versus speed.
Frequently Asked Questions
Q: What income-producing objects should I prioritize in Build a base RNG for early economy?
In the early game, focus on rolling for basic income items like the Starter Income Crate or Energy Node. These objects provide a steady flow of resources, allowing you to upgrade defenses sooner. Avoid spending all rolls on rare drops initially, as consistent income is key to scaling your base.
Q: How can group players avoid wasting rolls on duplicates during coordinated play?
Use in-game chat to communicate requests. For example, if the builder needs a specific defensive item like a Reinforced Wall, the roller should prioritize that over random rare rolls. This prevents duplicates and ensures rolls are used efficiently for upgrades and defenses.
Q: Are there specific map layouts in Build a base RNG that enhance economy for solo play?
While maps may vary, solo players should place income objects in protected central areas, away from main enemy paths. For instance, position Income Generators behind durable barriers like Stone Walls to minimize damage and maximize resource accumulation over time.
Conclusion
Optimizing your economy in Build a base RNG is essential for long-term success, whether you play alone or in a group. Solo play demands precise control over rolls and placement, with a focus on income objects and defensive balance. Group play leverages teamwork through role specialization and shared upgrades, but requires clear communication to avoid chaos. By adapting your strategy to your play style, using specific objects like income crates and defensive turrets, and knowing when to switch approaches, you can master the Roll, Build, Defend loop. Remember, with no codes to rely on, your economy management is your greatest asset in surviving the waves.
Active Build a base RNG Codes (October 2026)
3 verified codes available for Build a base RNG; 3 unverified codes are being tracked.