Introduction: Why Hidden Mechanics Matter in TNT Sandbox
As of September 2026, TNT Sandbox continues to operate without a code system, meaning all rewards stem from in-game mechanics. This absence of codes shifts the focus to hidden systems and smart play strategies that can dramatically improve your efficiency and score. Whether playing solo or in a group, understanding these lesser-known interactions is key to maximizing destruction and resource management. This guide dives into the core hidden mechanics, explaining why they matter, how to use them, and common pitfalls to avoid.
Hidden Systems and Lesser-Known Interactions
Several mechanics in TNT Sandbox are not immediately obvious but can be leveraged for significant advantages. The supply depot on the eastern edge of the map, for example, operates on a precise respawn cycle. Resources like steel and cement nodes refresh every 20 to 30 seconds, but the exact timing can be optimized. Another hidden system is the damage calculation, which rewards mass and density over scattered builds. Additionally, chain reactions follow specific physics rules where core explosions amplify blast radius based on material type.
These mechanics matter because they directly influence resource gathering speed, structural integrity, and explosive output. Ignoring them leads to wasted time, lower scores, and inefficient play. By mastering them, you can progress faster, achieve higher destruction multipliers, and adapt more effectively to both solo and group scenarios.
Optimizing Resource Respawn Cycles at the Supply Depot
To use the supply depot efficiently, head to the eastern edge where steel and cement nodes appear. The respawn timer starts when you collect a node, so avoid lingering after a full loop. Count the seconds between collections to maintain a rhythm. For solo play, circle the depot counterclockwise, gathering all steel first to avoid enemy bots in the central patrol zone. A complete loop yields 10 steel and 5 cement, enough for a large structure. In groups, assign one player to monitor respawn timers and signal others to collect, ensuring a steady supply chain.
Exploiting Damage System Quirks with Dense Builds
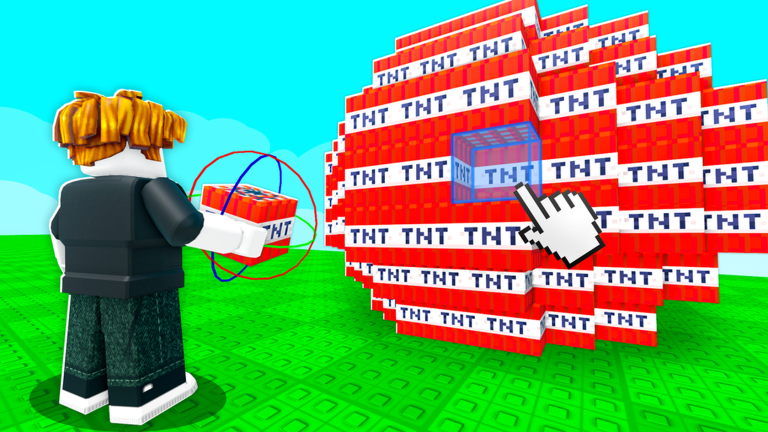
The game's damage system transmits shock better through solid, dense blocks rather than scattered parts. Use the grid-snap feature to build tight cubes without gaps. For optimal results, construct a 10x10x10 cube using steel for inner layers and cement for outer layers, as steel has superior shock transmission. This hidden mechanic increases total blast damage and score multipliers. Test with an 8x8x8 cube first to balance resource use and destructive potential, avoiding common mistakes like leaving empty spaces or using mixed materials inefficiently.
Maximizing Chain Reactions with Cascading Detonations
Chain reactions are not random; they follow a sequence where core explosions trigger surface charges. Place multiple charges deep within dense structures and detonate them in a specific order: start with the bottom layer to collapse upper floors, then ignite remaining charges as debris falls. This cascading effect increases total blast radius and personal score. Coordinate via voice chat in groups to synchronize detonations, with one player handling core charges and another triggering surface ones simultaneously.
Why These Mechanics Matter for Your Gameplay
Leveraging hidden mechanics directly impacts your progress. Efficient resource cycles reduce downtime, allowing continuous building. Dense builds exploit the damage system for higher scores without extra effort. Proper chain reactions multiply explosive outcomes, which is crucial for competitive play or group objectives. Without codes, these mechanics become the primary path to advancement, making them essential for both new and experienced players.
How to Implement These Strategies Step by Step
Start by practicing solo to refine resource gathering loops. Use a timer to track the 20-30 second respawn cycles and adjust your route to minimize overlap with enemy bots. When building, always use the grid-snap feature and prioritize steel in core layers. For detonations, experiment with charge placement by embedding at least three charges in a small cube and timing their sequence from bottom to top. In groups, establish clear roles: assign a Resource Gatherer to monitor depots, a Builder to construct dense structures, and a Detonator to manage charge timing.
- Solo: Focus on solo loops, 8x8x8 builds, and two-charge cascades.
- Group: Divide tasks, share resources via the crafting bench, and use the safe detonation zone 40 studs north with concrete barrier walls.
Common Mistakes to Avoid
Many players overlook respawn timing, leading to inefficient resource runs. Avoid building scattered structures, as they reduce shock transmission and blast damage. Do not detonate charges randomly, as this wastes explosives and lowers scores. In groups, failing to coordinate can cause duplicate efforts or unsafe detonations. Always communicate and assign roles to prevent these errors.
Frequently Asked Questions
Q: How do I know the exact respawn time for steel nodes at the supply depot?
The respawn time is between 20 and 30 seconds after collection. To track it, count aloud or use a stopwatch during your first few loops. Adjust your gathering route to coincide with respawns, ensuring you collect nodes as soon as they appear for maximum efficiency.
Q: What is the best material combination for dense builds to maximize blast damage?
Use steel for innermost layers due to its superior shock transmission properties, and cement for outer layers to add mass. Build a 10x10x10 cube with the grid-snap feature to eliminate gaps, as the game rewards solid mass over scattered parts for higher explosive output.
Q: Can chain reactions work with different types of explosives, or is timing the only factor?
Chain reactions depend on both timing and material density. Core explosions in dense steel layers amplify the blast radius when surface charges ignite simultaneously. Always place charges deep within structures and coordinate detonations from bottom to top to leverage this hidden mechanic.
Conclusion: Embrace Smart Play for Superior Results
In TNT Sandbox, mastering hidden mechanics is the cornerstone of smart play since codes are not an option. By optimizing resource cycles, building dense structures, and executing cascading detonations, you can achieve higher scores and more efficient destruction. Avoid common mistakes by staying attentive to respawn timers and coordinating in groups. Apply these strategies consistently, and you will see significant improvements in your gameplay for September 2026 and beyond.
Active TNT Sandbox Codes (October 2026)
No verified active codes are available right now for TNT Sandbox.