Introduction
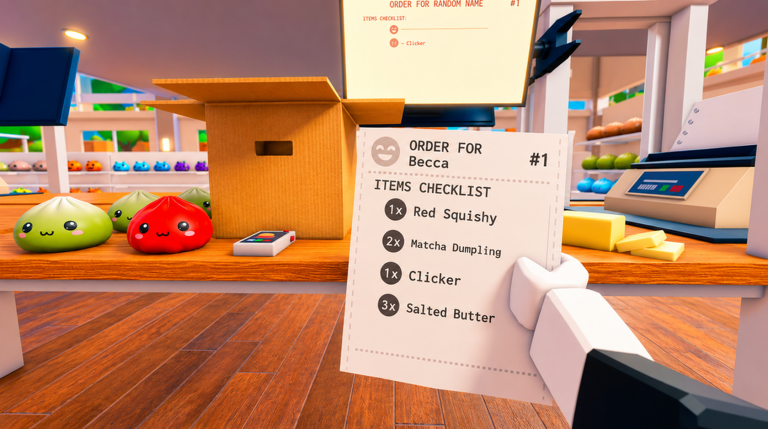
Welcome to the warehouse! In Pack an Order!, working together to find toys, pack boxes, and load trucks is the core of the game. But serious players know that winning isn't just about speed—it's about choosing the right route and upgrade loadout. This guide breaks down the most efficient strategies for solo and team runs, so you can climb the leaderboards.
Comparing Two Top Route Strategies: Zone-Clearing vs. Parallel Assembly
Every warehouse map in Pack an Order! is divided into shelf zones (A, B, C) leading to packing stations. Two main route styles dominate high-level play:
Zone-Clearing Route
This strategy focuses on clearing one shelf zone completely before moving on. For example, you start at Shelf A1 (where plush toys like "Bunny Buddy" spawn) and grab every item on that shelf. Then you move to A2, A3, etc., until zone A is empty. This works best on maps with wide aisles and few players, because you minimize backtracking. It's ideal for solo runs where you control the entire flow.
Parallel Assembly Route
In this method, you collect items from multiple zones simultaneously, dropping them at central packing stations. For instance, grab the Toy Racer Car from Shelf B2, then dash to Shelf C1 for a Board Game Box, and return to Packing Station 2. This route shines in teams of 3-4 players, where each player covers a different zone. The downside: if you're alone, you'll waste time running between zones.
When to use which: Use zone-clearing when playing solo or with 1-2 teammates. Use parallel assembly when you have a full squad and can communicate shelf assignments.
Best Upgrade Loadout for Fast Packs
Upgrades define your loadout. Focus on three categories: Movement, Inventory, and Scanning. For speed runs, we recommend this loadout:
- Speed Shoes (Level 3) – Increases run speed by 30%. Critical for reducing travel time between shelves and trucks.
- Quick Pack Gloves (Level 2) – Cuts box-sealing animation by 40%. Essential for packing stations, especially when fulfilling multiple orders quickly.
- Scanner Range Boost (Level 2) – Extends scanner beam range by 4 tiles. Allows you to verify items without walking right up to the shelf, saving seconds per grab.
- Large Pouch (Level 1) – Adds +2 inventory slots. With base 4 slots, you can carry 6 items at once, enabling you to gather multiple toys before returning to pack.
- Truck Loader (Level 1) – Increases loading speed onto trucks by 25%. The final leg of delivery is often the bottleneck; this upgrade shaves off precious seconds.
This loadout balances mobility, packing speed, and scanning efficiency. Avoid heavy upgrades like Giant Crate (boosts inventory but slows movement) unless you're on a map with short distances.
Advanced Micro-Optimizations for Every Run
Once you have your route and loadout, fine-tune with these hidden mechanics:
- Double-Scan Trick: When verifying items against customer tickets, scan two items at once if they are from the same aisle. The scanner has a brief cooldown, but you can start a second scan before the first finishes if you target quickly.
- Conveyor Belt Jump: On maps with conveyor belts in the packing area, jumping onto the belt while carrying items cancels the slowdown effect. This lets you "surf" at full speed to the truck zone.
- Shelf Memory: Each shelf type spawns specific toy categories. For example, Shelf C3 always contains action figures like "Robo Knight" and "Space Marine". Memorizing these reduces scanning time.
- Order Prioritization: When multiple trucks arrive, check the timer on each order. Some orders have no time limit (e.g., the "Bonus Delivery"). Pack those after tight-timer orders to avoid penalties.
Practice these in the Training Warehouse (unlocked at level 5) to build muscle memory.
Game-Specific Examples
Let's apply these strategies to the Map "Toytopia Warehouse". This map has zones A-D, with D being the truck area. The fastest route for a solo player is: Start at Shelf A1 (zone A: stuffed animals), then A2, then A3. After zone A, go directly to Packing Station 1 (closest to zone A). Pack all items, then sprint to truck zone D via the middle corridor. Use the conveyor belt jump from packing station to the corridor. Repeat for zone B. Avoid zone C until the last minute because it's far from Packing Station 1. If you have two players, one takes zone A/B, the other takes C, and they meet at Packing Station 2 (central).
Frequently Asked Questions
Q: Should I upgrade Scanning Range or Speed Shoes first?
A: Prioritize Speed Shoes to Level 2 before Scanning Range. Movement speed is crucial in early runs because you waste more time traveling than scanning. Once you have Level 2 Speed Shoes, invest in Scanning Range Level 1 for a noticeable efficiency bump.
Q: Is the Large Pouch upgrade worth it for speed runs?
A: Yes, absolutely. The extra two slots allow you to grab six items before returning to pack. This reduces round trips by up to 50% on small orders. On large orders, it's even more beneficial. However, avoid the Giant Crate upgrade unless you plan on pack-heavy routes.
Q: How do I unlock the Conveyor Belt Jump trick?
A: There's no unlock requirement—just jump while walking onto a conveyor belt. The effect works immediately. Note that you must be carrying at least one item to maintain speed; empty-handed jumps don't provide the speed boost.
Conclusion
Mastering Pack an Order! means choosing the right route, loadout, and micro-optimizations for each situation. Use zone-clearing for solo runs and parallel assembly for team plays. Equip Speed Shoes, Quick Pack Gloves, Scanner Range Boost, Large Pouch, and Truck Loader for a balanced speed loadout. Practice the double-scan trick, conveyor belt surfing, and shelf memory to shave seconds off your time. With these strategies, you'll dominate the leaderboards in July 2026 and beyond.
Active Pack an Order! Codes (July 2026)
No verified active codes are available right now for Pack an Order!.
This article was researched and generated using AI tools, then reviewed by the RoUniverse editorial team.